
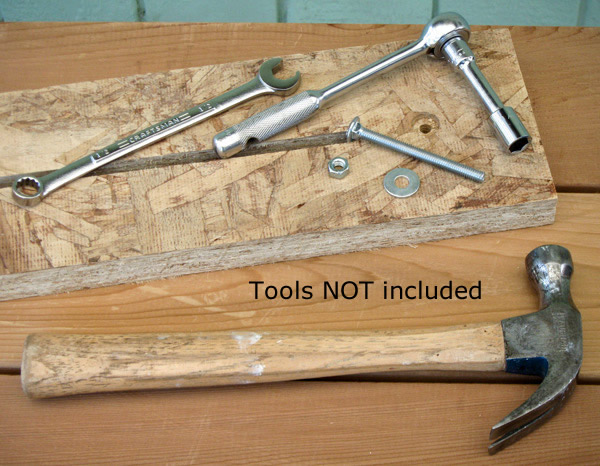
 Assemble your LEVEL-it® quickly & easily using these simple hand tools (or power tools). Tools NOT included with LEVEL-it®.
Assemble a LEVEL-it®
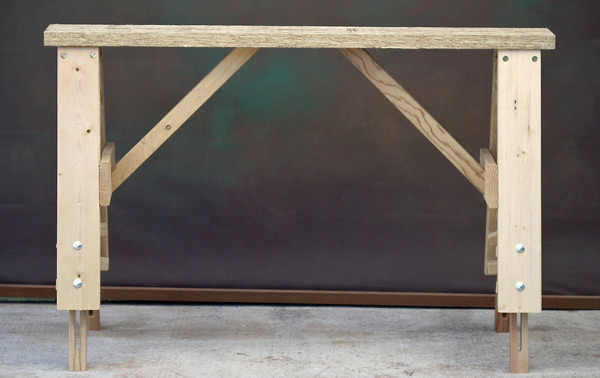
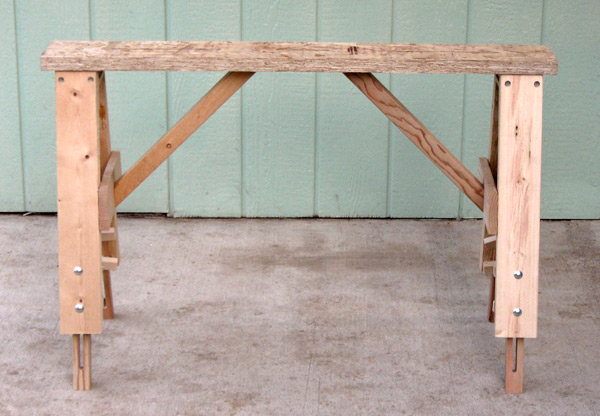 Here is an assembled a LEVEL-it®. What follows are detailed instructions, with photographs, showing how to assemble it.
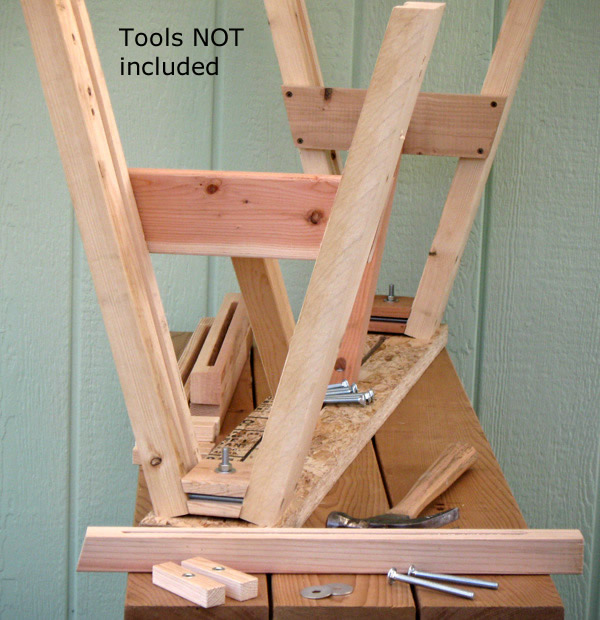
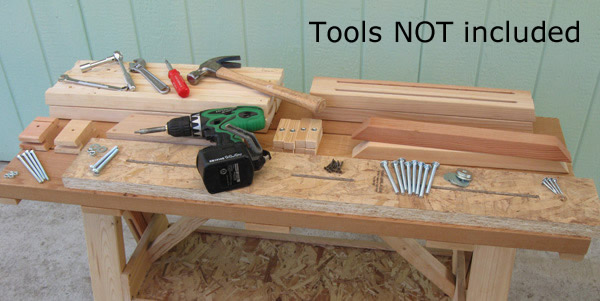 Here are all the parts that go into a LEVEL-it®; along with a selection of tools to complete the assembly. While a LEVEL-it® can be assembled with just hammer, screw driver and some kind of wrench, we are showing both manual and power drivers and several kinds of wrenches. Use the kind of driver and the kind of wrench that you have.
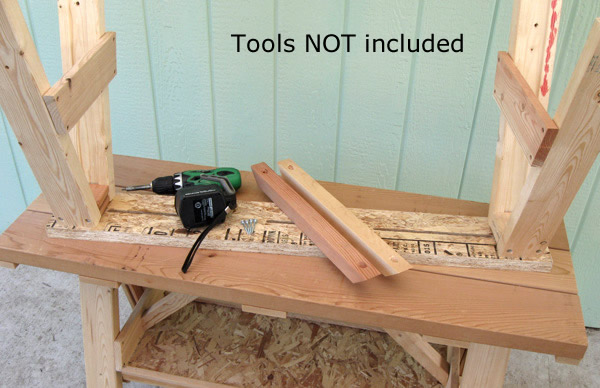
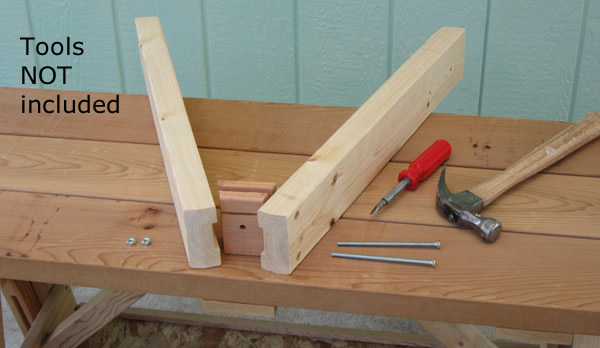 Start by putting together the two leg assemblies. The two leg assemblies are each made up of two legs, an upper brace and a lower brace. Here we are about the install the upper brace between two legs. Place each upper brace between the tops of two legs. Thread the 1/4” X 5” machine screws through the bolt holes in the tops of the legs and the slots in the upper braces as shown. Place 1/4” hex nuts on the threaded ends of the machine screws and tighten the machine screws with a screwdriver. The nuts will “bite” into the countersinks in the wood at the tops of the legs. Tighten “snugly”, but do not overtighten.
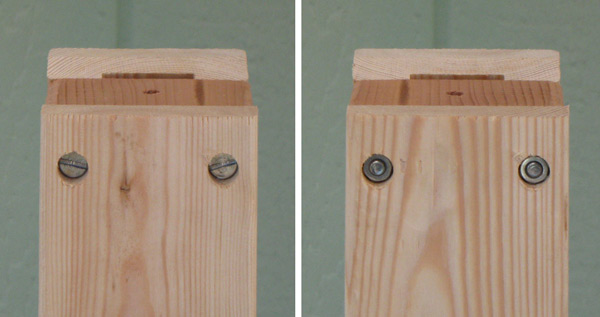
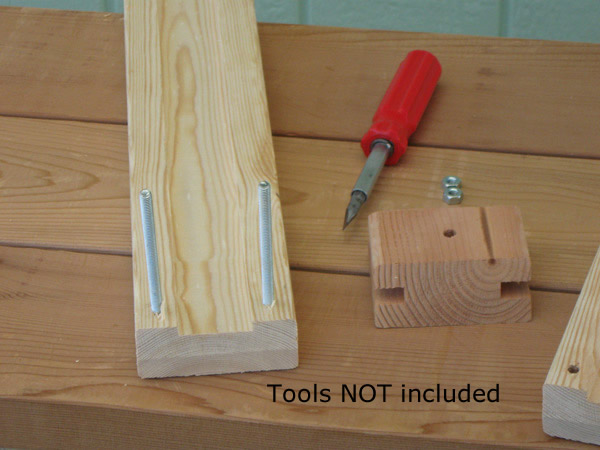 Above is shown a leg with two 1/4” X 5” machine screws properly threaded through it.
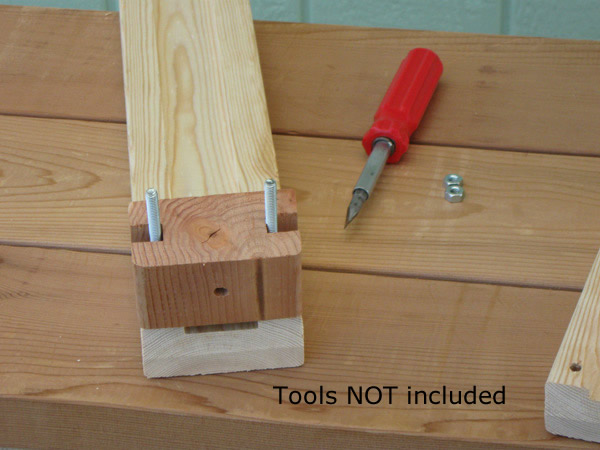 Here is shown the upper brace loosely in place prior to attachment of the other leg.
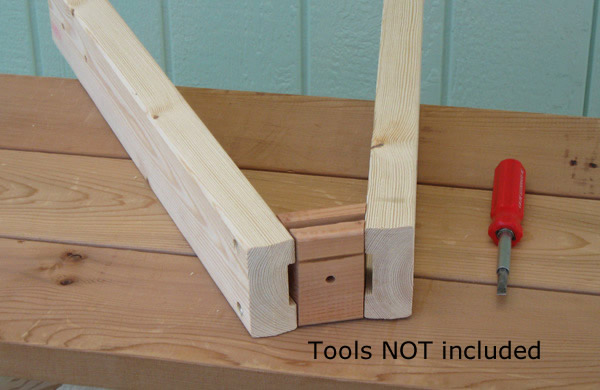 When you have assembled each top brace into each leg assembly it should look like it does in this photo...
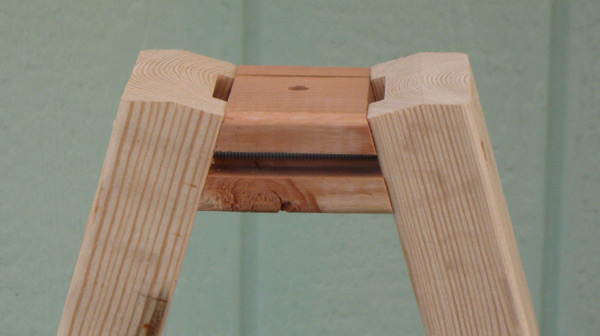
 ...and in these photos.
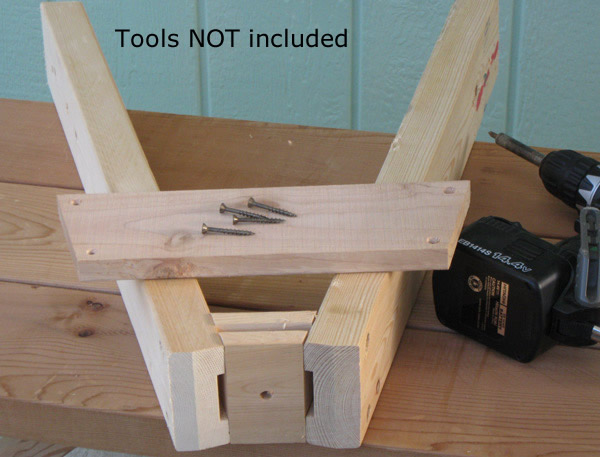 Now we’ll assemble each of the two lower braces into each of the two leg assemblies. Each lower brace is attached to a leg assembly using 4 (four) #8 X 1-1/2” Flat Head Screws (see photo above)
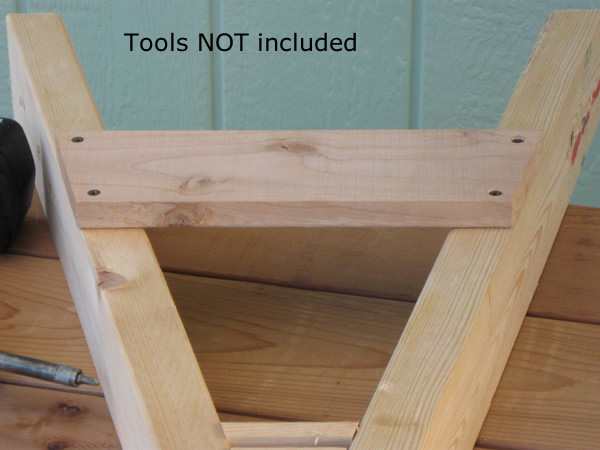 “Square up” each lower brace and position it so the two ends of the lower brace are flush and even with the outside faces of the legs as shown here. Then fasten each lower brace to legs with four #8 X 1-1/2” screws. The photo above shows how it should look when each lower brace is attached to a leg assembly.
 Now that both leg assemblies are complete we’ll attach the two leg assemblies to the LEVEL-it® top.
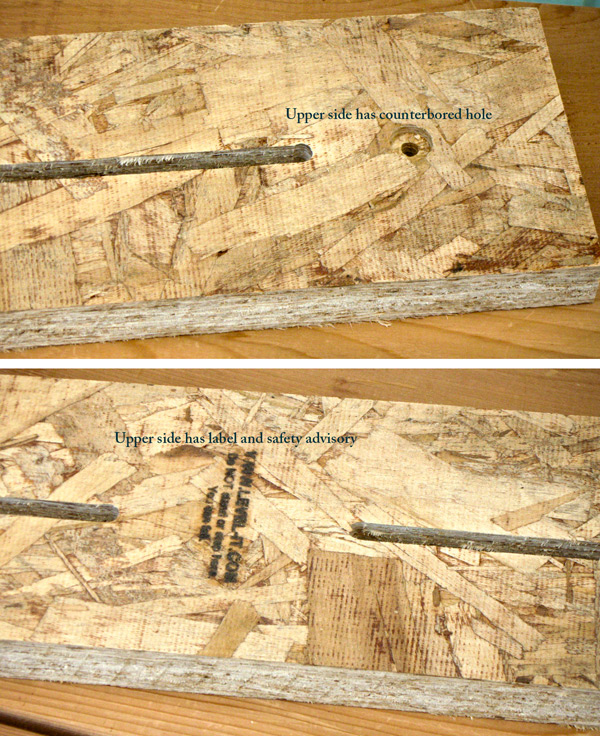
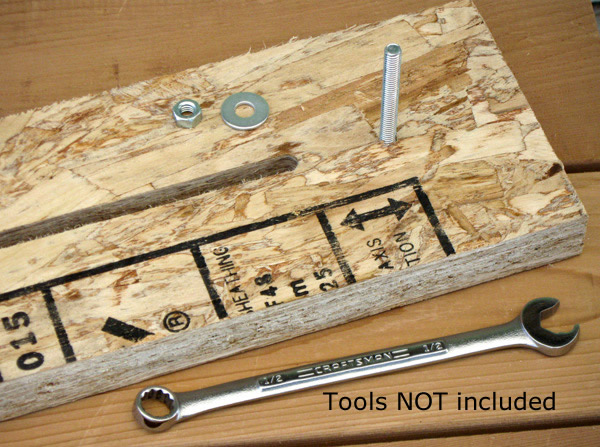
The upper side of the LEVEL-it® top is different from the lower side of the LEVEL-it® top. See photo above to see how distinguish the upper side from the lower side.
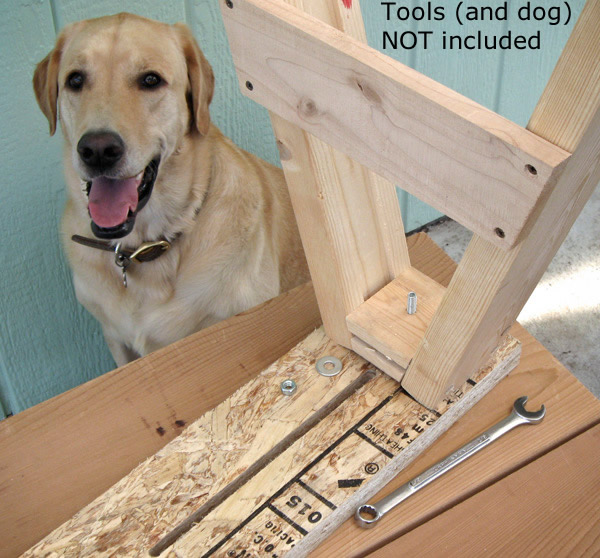
 Each leg assembly is attached to the lower side of the LEVEL-it® top with a 5/16” X 3-1/2” carriage bolt, a 5/16” flat washer and a 5/16” hex nut. You may need a hammer to gently tap the carriage bolts through the counterbored holes in the LEVEL-it® top. You will need some kind of wrench to tighten the nuts onto the carriage bolts. Two kinds of wrenches are shown here. Use the kind you have.
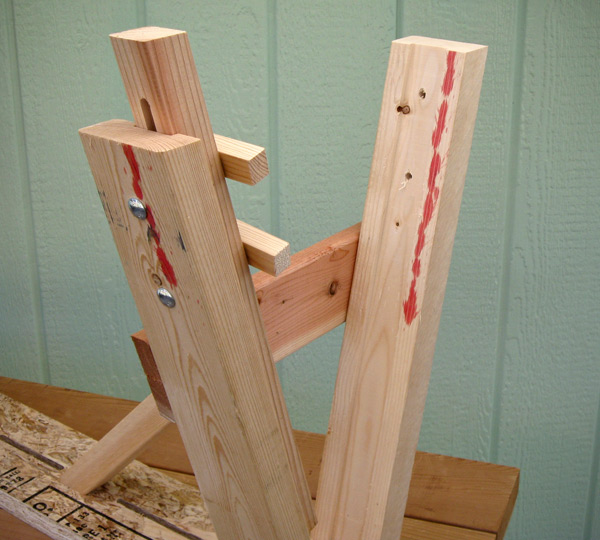
 Thread a 5/16” X 3-1/2” carriage bolt through the counterbored holes in the LEVEL-it® top and through the holes in the middles of the upper braces...
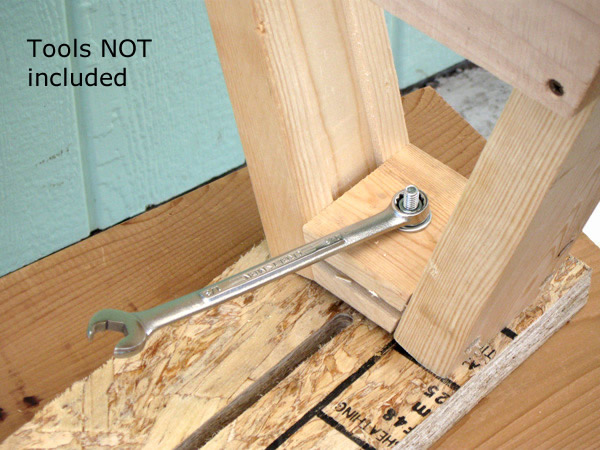 ... and place a 5/16” flat washer and a 5/16” hex nut over the ends of each bolt and tighten securely with a wrench.
note how tops of legs are parallel to bottom edge of LEVEL-it® top and remember – lower braces face IN (see picture)
“Square up” the leg assemblies to the LEVEL-it® top.
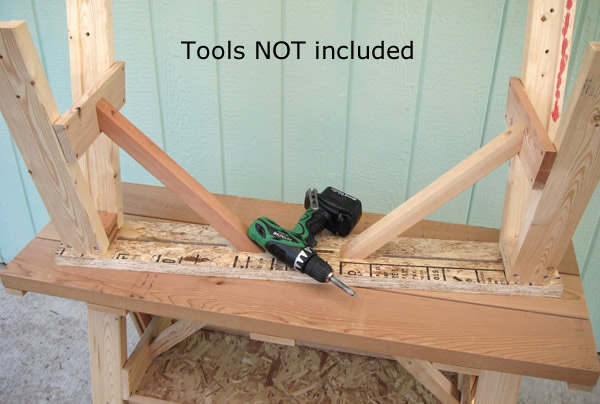 With the leg assemblies attached it is time to attach each diagonal braces with 2 (two) #8 X 1-1/2” washer head screws.
Making sure to “square up” the leg assemblies to the LEVEL-it® top, hold the diagonal braces in place against the bottom side of the LEVEL-it® top and the lower braces as shown. Fasten the two diagonal braces with #8 X 1-1/2” washer head screws as shown.
 Now that the leg assemblies and diagonal braces have been assembled we can fit the four leg extensions into the grooves of the legs using 5/16” X 3-1/2” carriage bolts, 5/16” fender washers and the large wood wingnuts.
• Always make sure the metal hex nut that is embedded in the wood wing nut is on the outside.
Thread two 3-1/2” carriage bolts through the two lower holes in each leg and through the long slot in each extension. Place a large fender washer and a wood wing nut on the threaded end of each bolt and tighten securely.
• Always make sure the metal hex nut that is embedded in the wood wing nut is on the outside.
• TIP: To “set” the bolts when you first complete this step lightly tap each carriage bolt head with a hammer while tightening the wood wing nuts with your other hand. This will slightly sink the carriage bolt heads into the wood where they will grip well and not work their way out. Most important, it will help hold the extensions in place more securely for your safety!
• And remember - always make sure the metal hex nut that is embedded in the wood wing nut is on the outside.
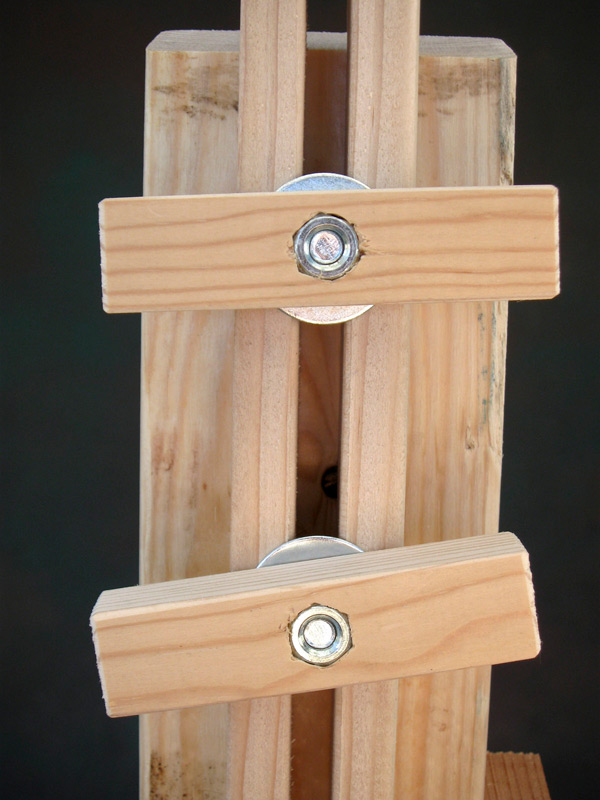 Here is how it should look when the extension is installed in the groove of the leg using two 5/16” X 3-1/2” carriage bolts, two 5/16” fender washers and two wood wingnuts.
• Always make sure the metal hex nut that is embedded in the wood wing nut is on the outside as shown in the photograph above.
 Here is how it should look when the extension is installed in the groove of the leg using two 5/16” X 3-1/2” carriage bolts, two 5/16” fender washers and two wood wingnuts.
• Always make sure the metal hex nut that is embedded in the wood wing nut is on the outside.
 Your LEVEL-it® Workbench is now assembled and ready for use. Make sure all fasteners are properly tightened.
We hope you will enjoy many years of safe good use with your Amazing LEVEL-it® Workbench.